Cubed: Spatial Media, Squared
The Concept: Breaking the Sphere
360-degree media is normally shown as interactive 'spherical' scenes. The user looks out around themselves at the immersive image. These 360 VR images can be photos, videos, even illustrations – unusual but true! But have you thought about looking at a scene from the outside? Turning it into a floating object you can grab and spin in front of you? Go on then, have a go...
Cubed takes 360 spherical media and wraps it around a clean, 6-sided interactive cube. Now you can show a 360-degree scene as a 3D object: look at it from the outside rather than going in! The Cube is not an app, it's an HTML file you can add to any web site.
By mapping pixels to the sides of a 3D box, you create a 'spatial cube' that can be spun, zoomed and generally played with. Whether it’s 360-degree photo or 360-degree video, these toys give your media an attention-grabbing presence.
Cubed demo: try the Image Cube
This is a lightweight, high-performance way to showcase 360-degree photography. It uses CSS 3D transforms to create a seamless environment that you can rotate and zoom using your mouse, touch or keyboard. Double-click the cube to return it to its starting position and scale.
Ideal for: Architectural photography, virtual tours, and skyboxes.
Cube Maker: build your own Image Cube
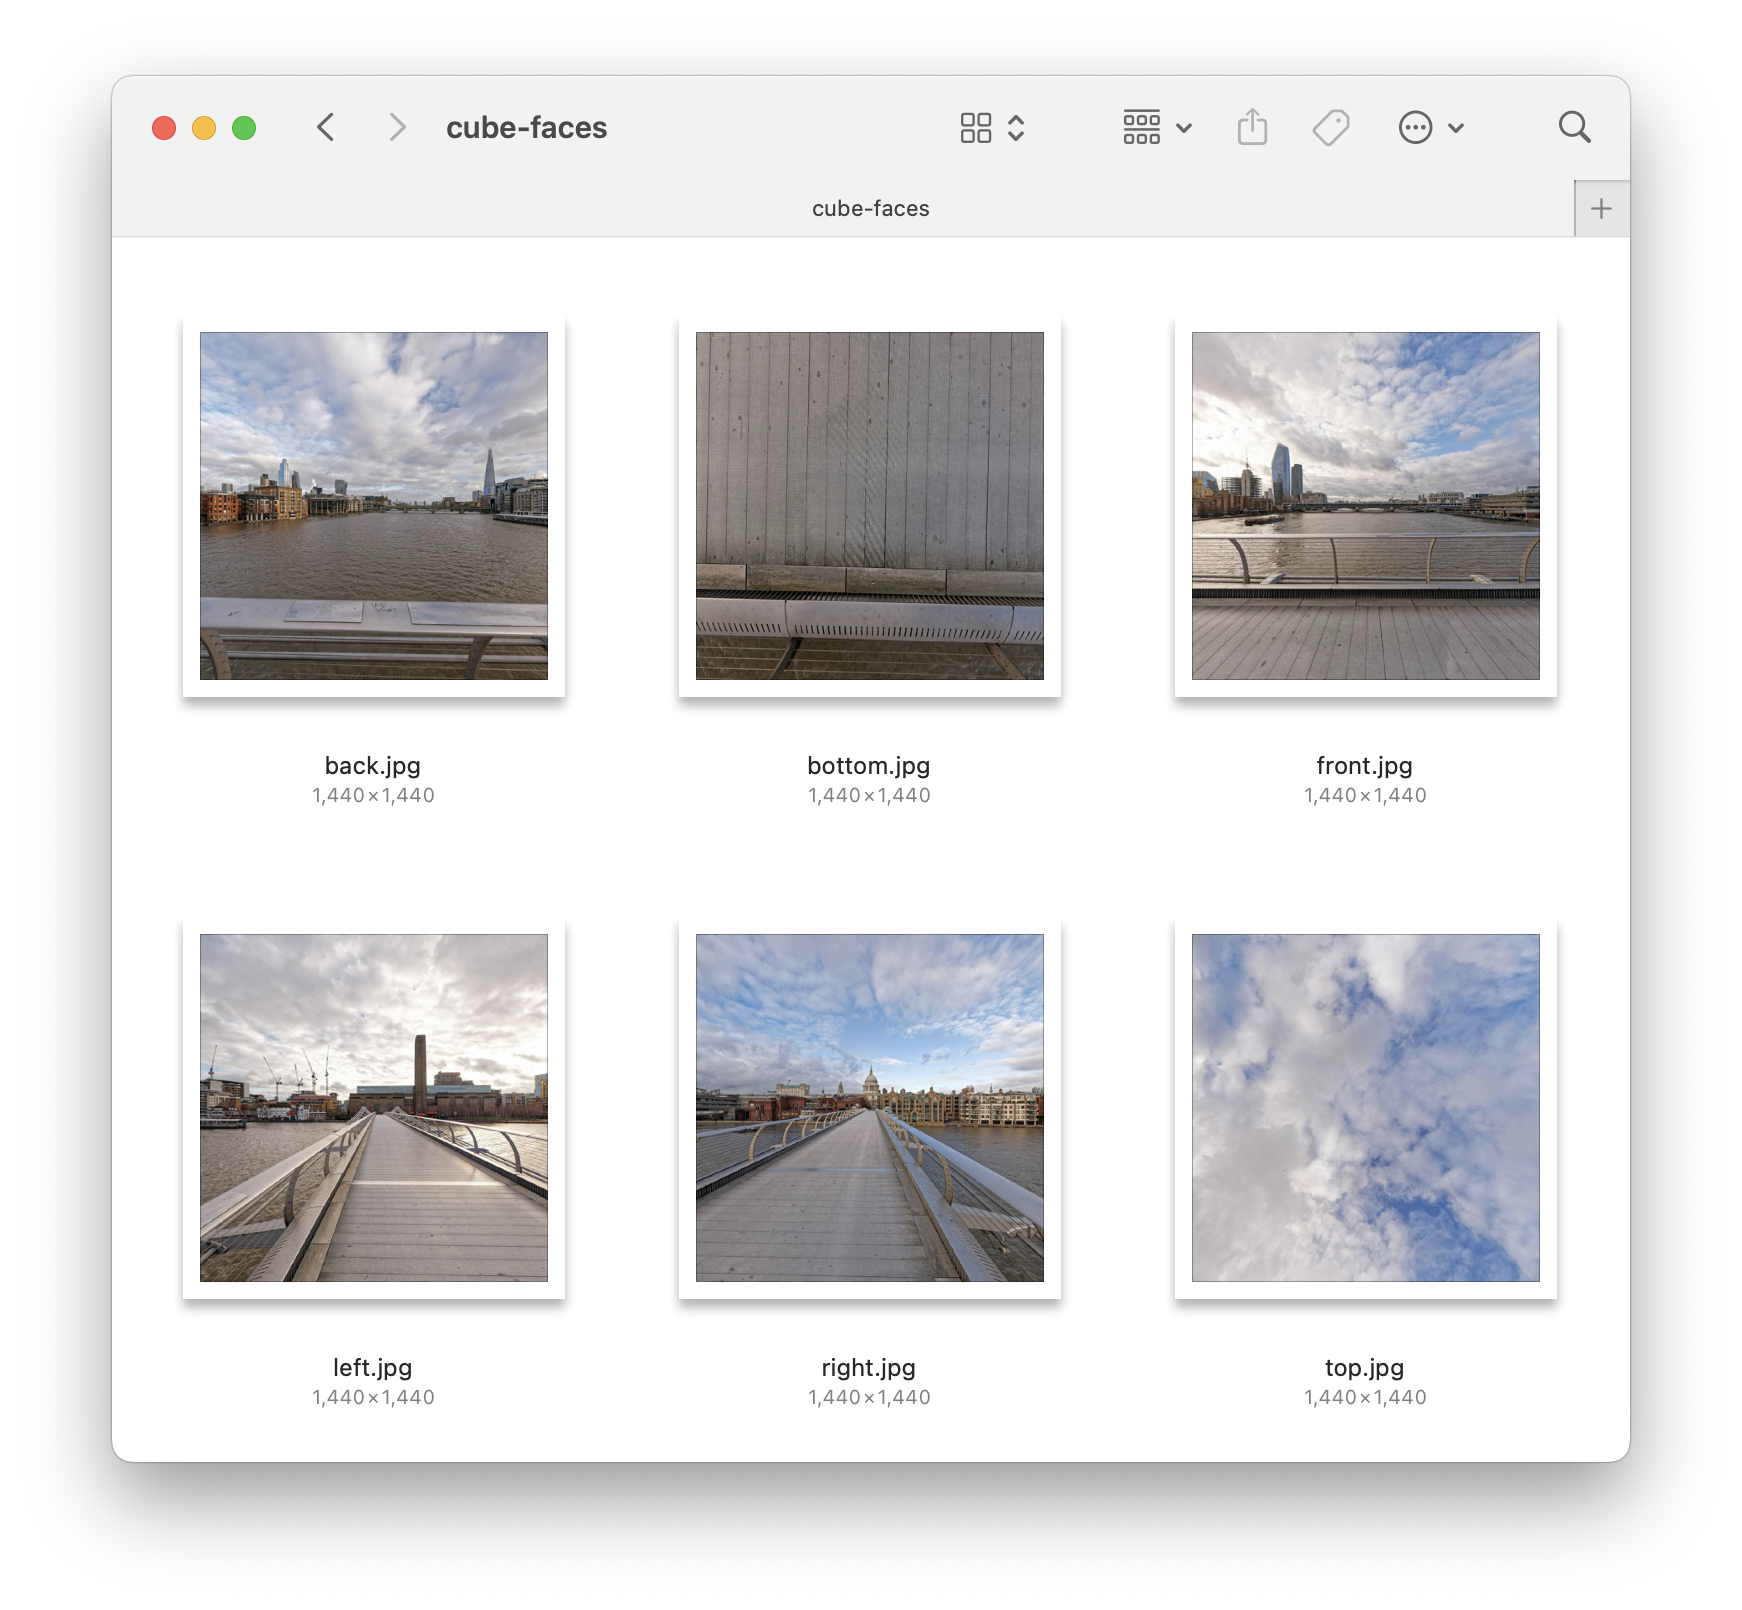
One click, no code! Cube Maker takes your equirectangular 360 photos and does the geometry for you, outputting six perfectly aligned tiles, scaled and ready for the 3D cube engine. Simply upload an equirectangular image in JPEG format and you'll get your cube faces downloaded in return. The download will also include a copy of the HTML file used to play these as an interactive 3D cube.
You can optionally choose to have the cube face pixel size be generated at the maximum scale that your input image allows, but large images may fail to convert.
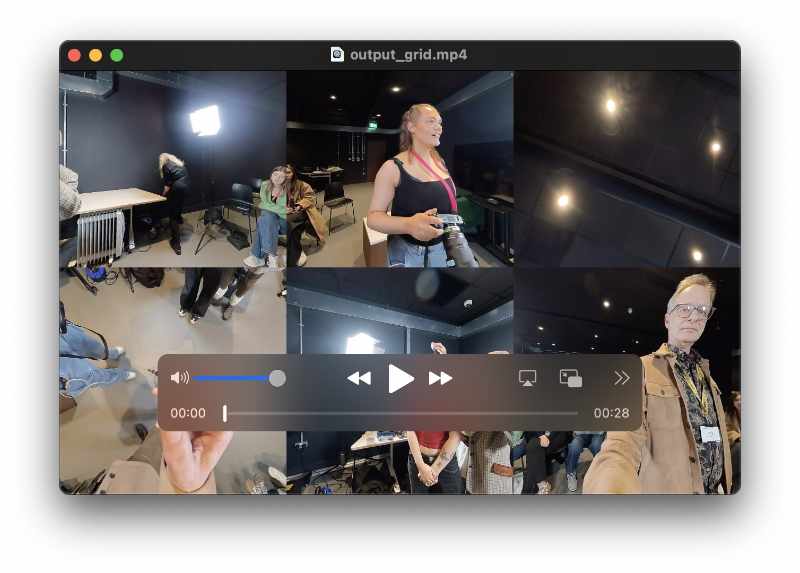
Cubed experiment: The Video Cube
This tool synchronizes six virtual cameras across a single 3x2 video grid, playing the scene parts distributed across all six faces of the 3D cube. It features a play/pause control, synchronized audio playback (muted by default), and an intuitive ‘dolly zoom’ that moves you through the 3D space with your mouse, touch or keyboard.
Ideal for: Immersive events, VR-lite experiences, and interaction design experiments.
Note: Video playback is most stable in Chrome and Edge. Safari handles it, but performance may vary based on your system's hardware decoding limits. For your own media, reduce the pixel sizes and compress hard. This works better played locally rather than online.
Wait, how does this work?
For the curious, each Cube is built using standard HTML5, CSS3, and a splash of vanilla JavaScript. No heavy 3D libraries – no Three.js or similar – are needed here. These simply use the browser’s native ability to manipulate planes in 3D space.
Key Features across both Cubes:
Physical Zoom: Move through the Z-axis with your scroll wheel or pinch-zoom interactions.
Keyboard Support: Rotate with precision using arrow keys.
One-Touch Reset: Double-click to snap back to the starting orientation and scale.
Mobile Friendly: Touch-responsive dragging for tablets and phones.
These Cube projects are all free, like my other productions, tools and experiments. But if you find this useful feel free to leave a tip! It all helps pay for my hosting and dev costs.
Preparation: how to put your own media on a Cube
- Download the source files
- Replace the example media with your own
- Open the HTML file in your browser (locally or from a web site)
Step 2 is the trick, because before you can play, you have to project. You can't just take a panorama image or video straight from a 360 camera or stitching tool and slap it onto a cube. First you need to ‘de-warp’ the sphere into six flat, rectilinear cube faces.
For 360-degree images: convert your equirectangular image to six separate cube face JPEG files. You can do this with your own tools (PTGui, Pano2VR, KRPano, and so on) – or you can use the Cube Maker tool.
For 360-degree video: you need to convert the normal equirectangular format into a different industry standard arrangement, a 3:2 cube-face video with all the sides in one file. Using one video for all six faces improves playback sync. This is more experimental, but it helps to reduce the pixel dimensions of your video and increase compression to help reduce stuttering. It also performs better playing locally than online.
Adobe has been effectively downgrading the VR plugins used for managing 360 video by changing controls and removing features, but there are still ways to generate the required 3:2 cube-face video using Premiere or After Effects.
FFmpeg is a powerful command-line tool that does this with minimal fuss, although you do need to have this tool installed (it's free, but it's fiddly to set up) and use Terminal to give it commands.
DaVinci Resolve is an excellent way to generate the 3:2 format and this can be done using the free version.
Instructions for these different methods will be added soon.